UNDERGROUND WATER TANK COVER
Environmental Department offers high-quality Underground Water Tank Covers designed to protect water sources and prevent odors from affecting the space above. These covers are ideal for use in households and public works, including clean water tanks, septic tanks, manholes, and tunnels.
1. Detailed Parameters
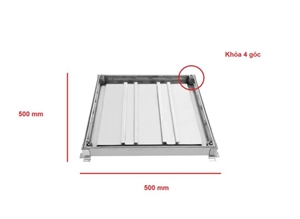
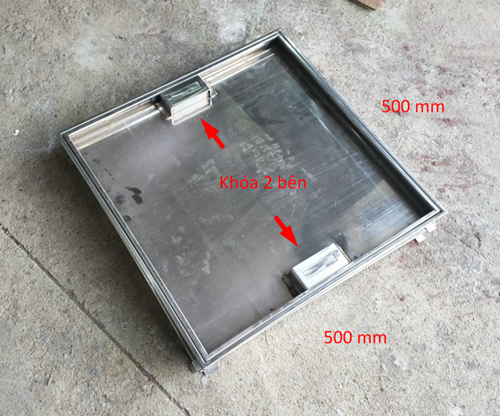
- Cover size (length x width x height): 500x500x50 mm.
- Tiled Upper Layer Dimensions: 500x500x30 mm.
- Condition: 100% New.
- Material: Rust-resistant 304 stainless steel.
- Thickness: Available in 1, 3, 4, or 5 mm, depending on load requirements.
- Odor Prevention: Rubber gaskets to prevent odors.
- Locking Mechanism: 2-sided handle hook lock or 4-corner lock with threaded ends.
- Standard Load Capacity: 300 kg (customizable upon request).
- Production Technology: 100% automatic laser cutting and welding.
2. Specifications
❖ Top Cover:
● Dimensions: 500×500 mm.
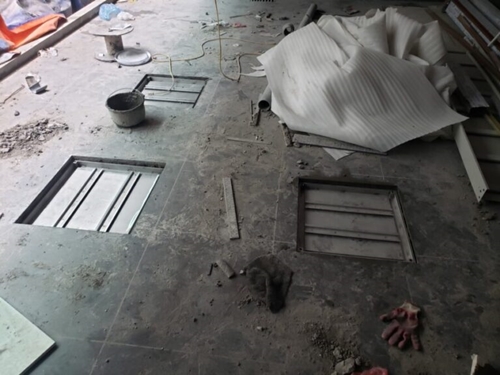
● Design: Load-bearing support bar, can be tiled.
● Function: Supports pressure from above and enhances space aesthetics.
● Included Accessories: Hexagonal unlocking set, stainless steel ear, handle.
❖ Bottom Frame:
● Dimensions: 500×500 mm.
● Function: Withstands impact from above.
● Included Accessories: Rubber gasket.
3. Key Features
✢ Compact and Easy to Install: Lightweight and easy to move, open, and close, making it suitable for both civil and public projects.
✢ High-Quality Materials: Made from rust-free 304 stainless steel, ensuring durability and a shiny appearance.
✢ Good Bearing Capacity: Thickness of 1-5 mm allows the cover to withstand large surface impacts without warping or denting.
✢ Effective Protection: The lid and frame fit tightly together with rubber gaskets and hexagonal locks, creating a sealed space that protects the water source from waste, dirt, and insects.
4. Installation Process for Underground Water Tank Covers
Step 1: Preparation
- Gather materials: mortar, 75% yellow sand cement, finishing tiles, tile glue, and joint color.
- Prepare the ground by checking the size of the light hole, the cover, and the tank lid height. Ensure the tanks ventilation hole is smaller than or equal to the lid frame size.
Step 2: Create the Tank Wall Width
The tank wall should be at least 50 mm wider than the tank lid frame and 30 mm deeper than the frame height.
Step 3: Apply Mortar
Spread an even layer of mortar, at least 30 mm thick, across the tank mouth to fully support the lid frame without gaps.
Step 4: Insert the Outer Frame
Place the outer frame with mortar, ensuring the top is flat and level with the finished floor. Avoid tension to prevent frame deformation.
Step 5: Position the Cover
Place the cover inside the lower frame and tape around the slots and keyholes to prevent cement mortar from sticking.
Step 6: Smooth the Lid Surface
Smooth the inside of the lid with light mortar to match the tile thickness. Use a flat ruler, tapping and vibrating if necessary, to eliminate voids.
Step 7: Apply Tile Glue
After the core layer dries, use tile glue and complete the joints, ensuring the cover is placed inside the frame during grouting and tiling.
Step 8: Clean and Protect
Clean the outer surface of the cover and shield it. After 3 days, the cover can be opened and used. Limit accessing the tank through the lid due to its small size use a support person if necessary.
Contact Environmental Department for details and support on warranty and sales policies when purchasing Underground Water Tank Covers!


